☘️Portfolio - User Guide
Install:
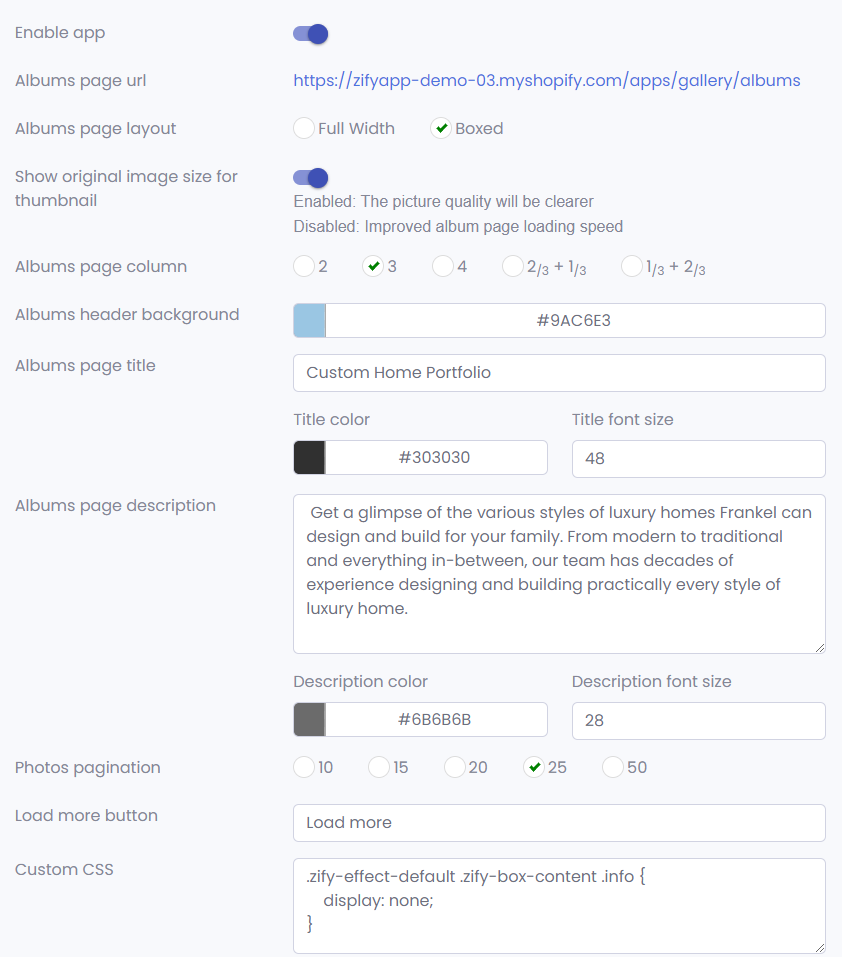
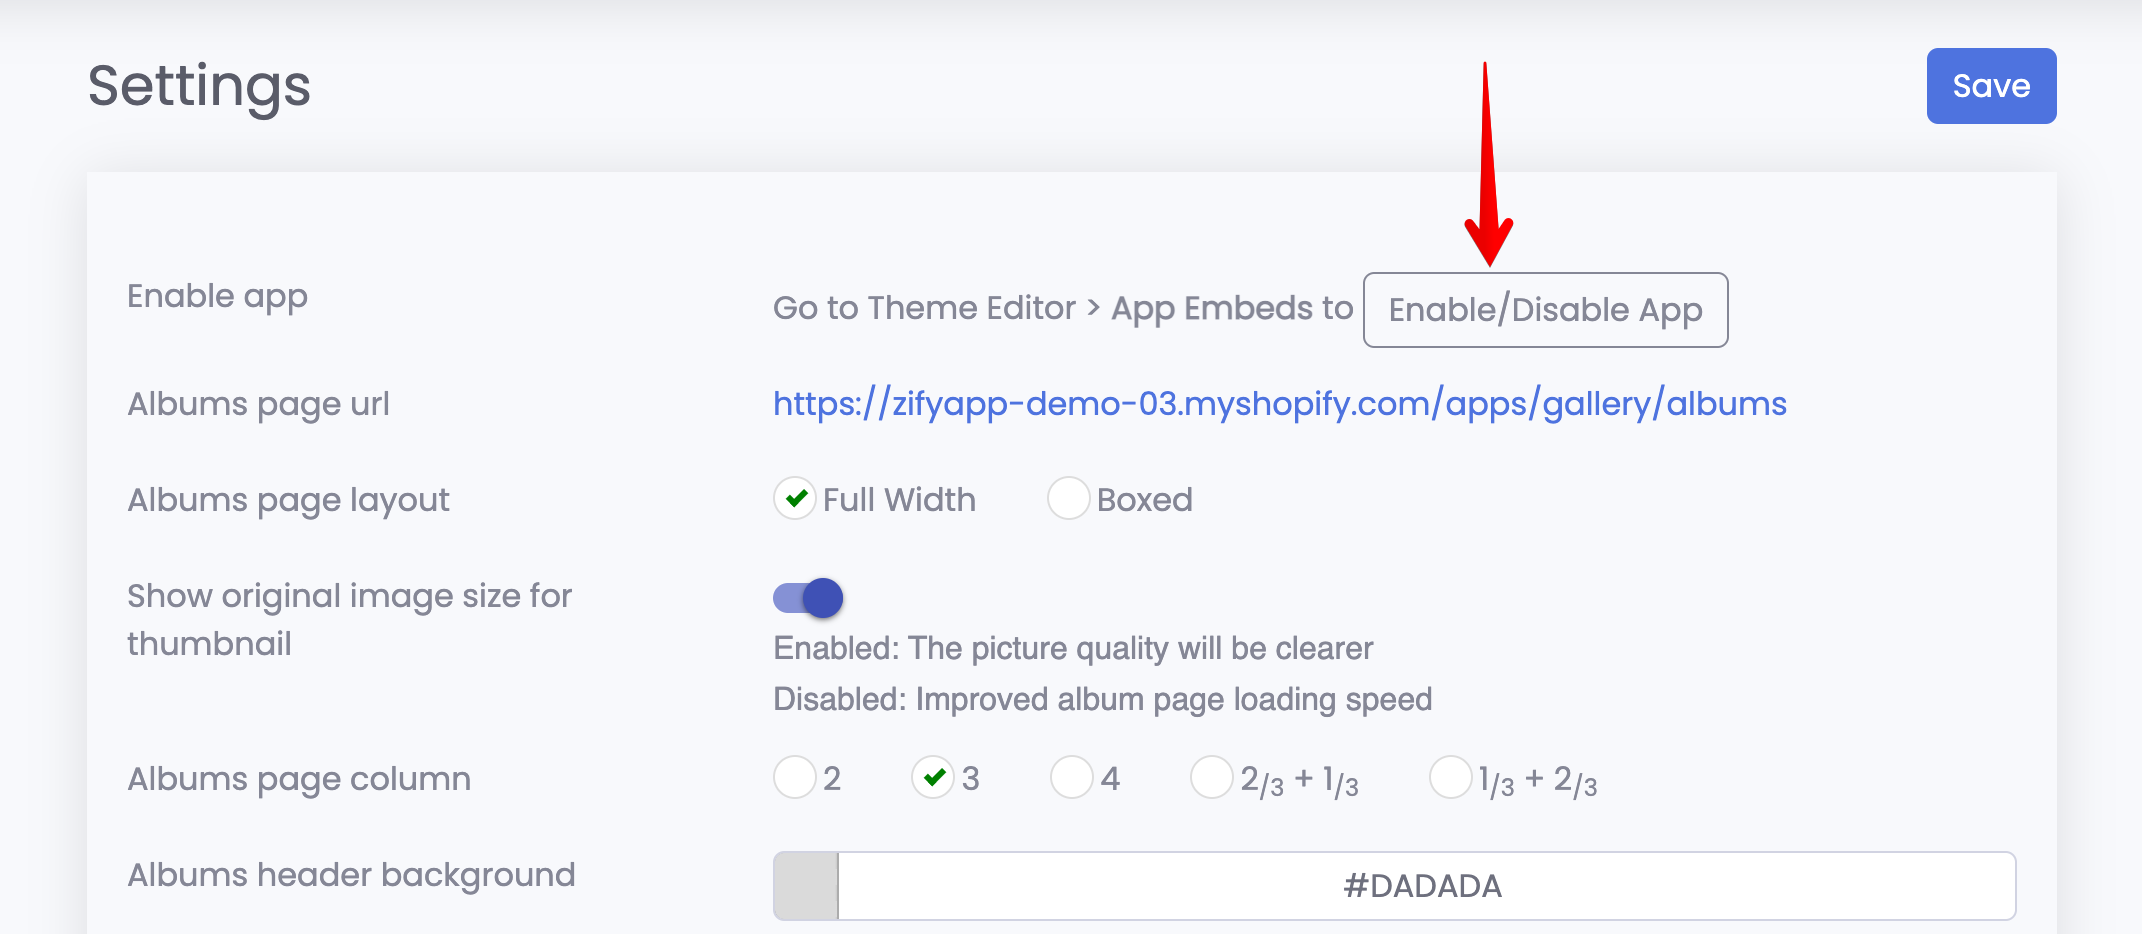
After installed our Portfolio Gallery app, the app will redirect you to the Manage Albums screen. The first, let enable the app. Please click the Settings from the left navigation to enable the app.
Enable app: Active/Deactive the app.
Albums page url: Default: https://your_shopify_store/apps/gallery/albums.
Albums page layout: Easy to change portfolio gallery albums page layout: Full width or Boxed.
Albums page column: Easy to change the portfolio gallery albums page column: 2 columns(1/2+1/2), 2 columns(2/3+1/3), 2 columns(1/3+2/3), 3 columns or 4 columns.
Albums header background: Easy to change the portfolio gallery albums header background.
Albums page title: Easy to change the portfolio gallery albums page title(Good for SEO), color and font size.
Albums page description: Easy to change the portfolio gallery albums page description(Good for SEO), color and font size.
Photos pagination: Easy to change the photos pagination per a specific album page: paginate your gallery photo to make it load faster without refreshing browser.
Load more button: Load more photos button with ajax without refreshing browser, does not slow down your website.
Custom CSS: Easy to add custom CSS code without change the theme. See the screenshot below:
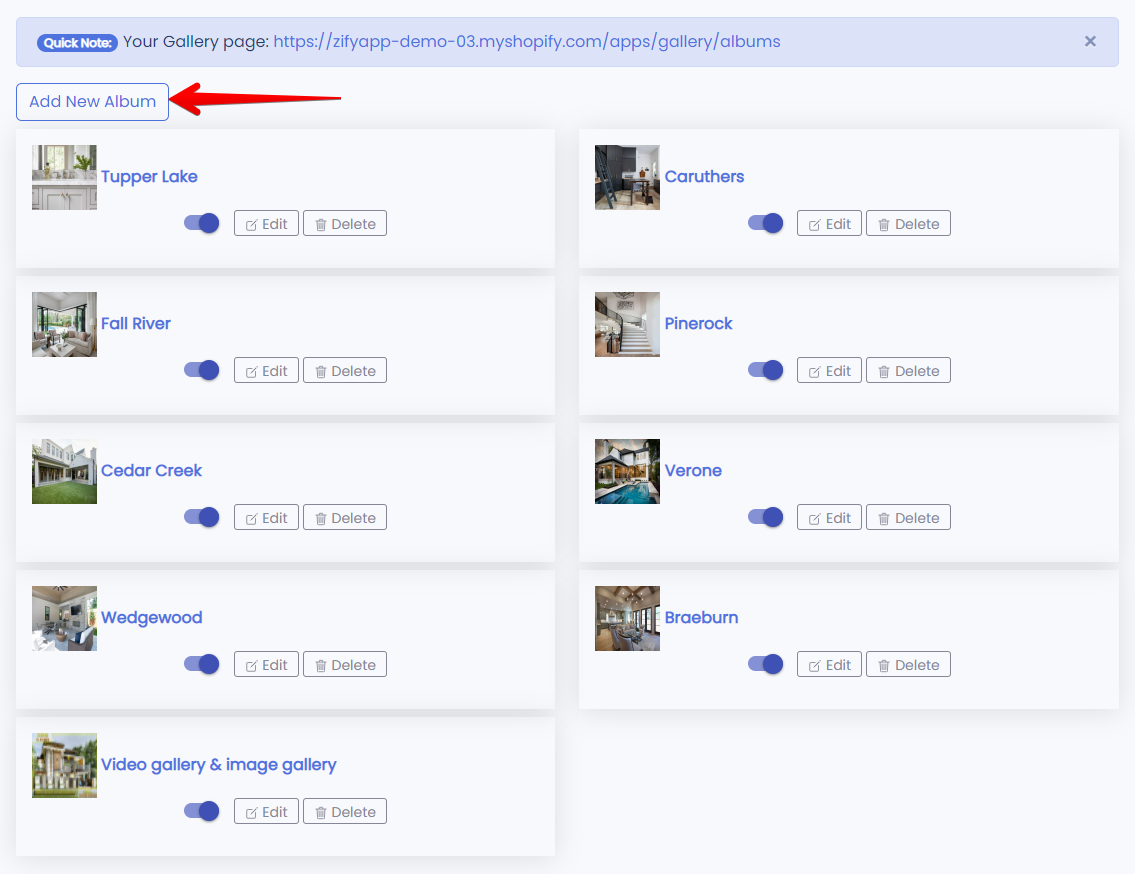
Add new an album:
From the Manage Albums, click "Add New Album" button.
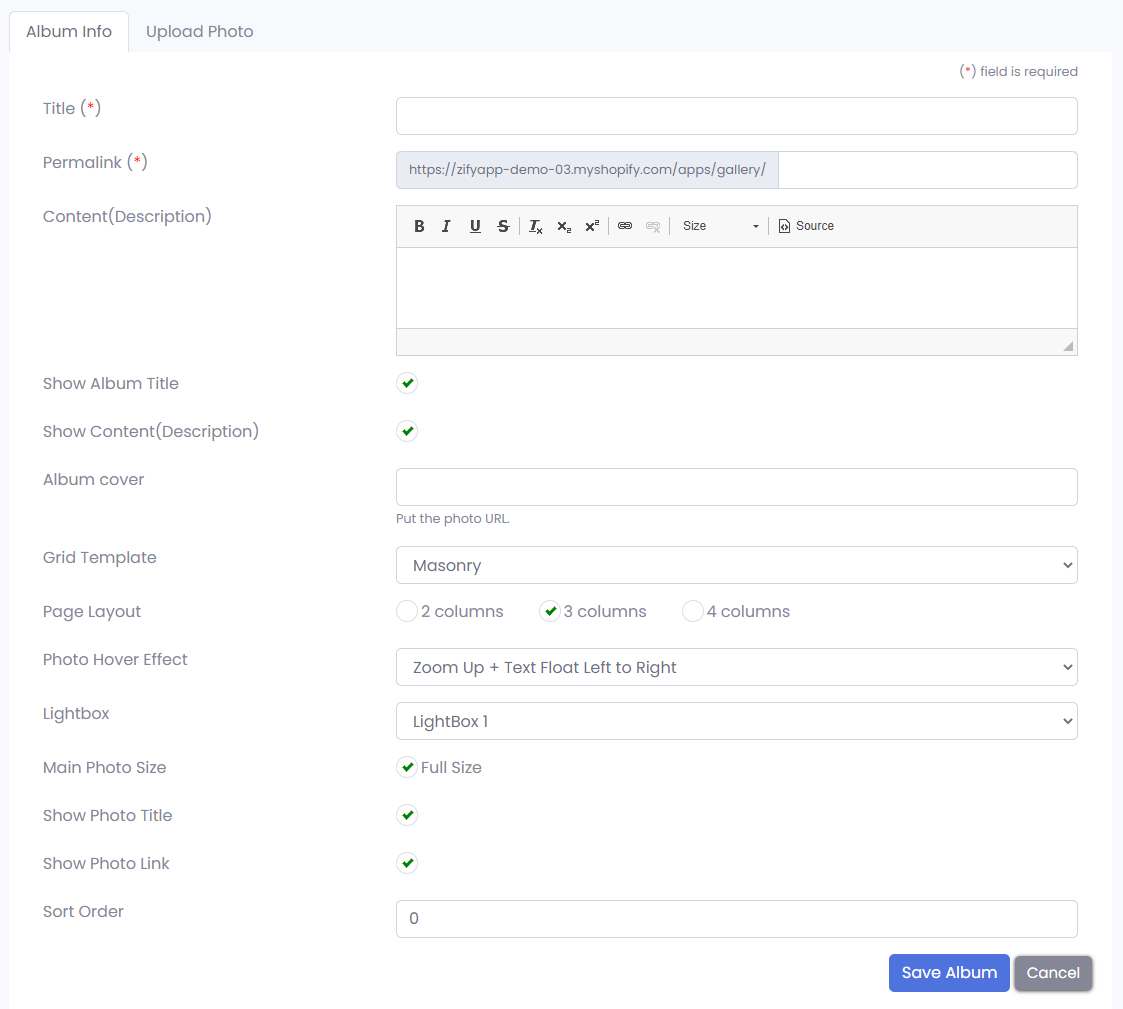
Step 1: Album Info
Title: Easy to add/change album name (Good for SEO).
Permalink: Auto generate the permalink (URL friendly, good for SEO).
Content(Description): Easy to add/change album content/description (Good for SEO).
Grid Template: Easy to change the album grid template (Grid, Masonry).
Page Layout: Easy to change the album page layout: 2 columns (2 photos per row), 3 columns (3 photos per row), 4 columns (4 photos per row).
Photo Hover Effect: Easy to change the hover effect when hover on photo. (25 available effects: hover, overlay, caption, buttons animations).
Sort Order: Easy to set sort order for album on the main albums page. See the screenshot below.
Step 2: Upload Photo
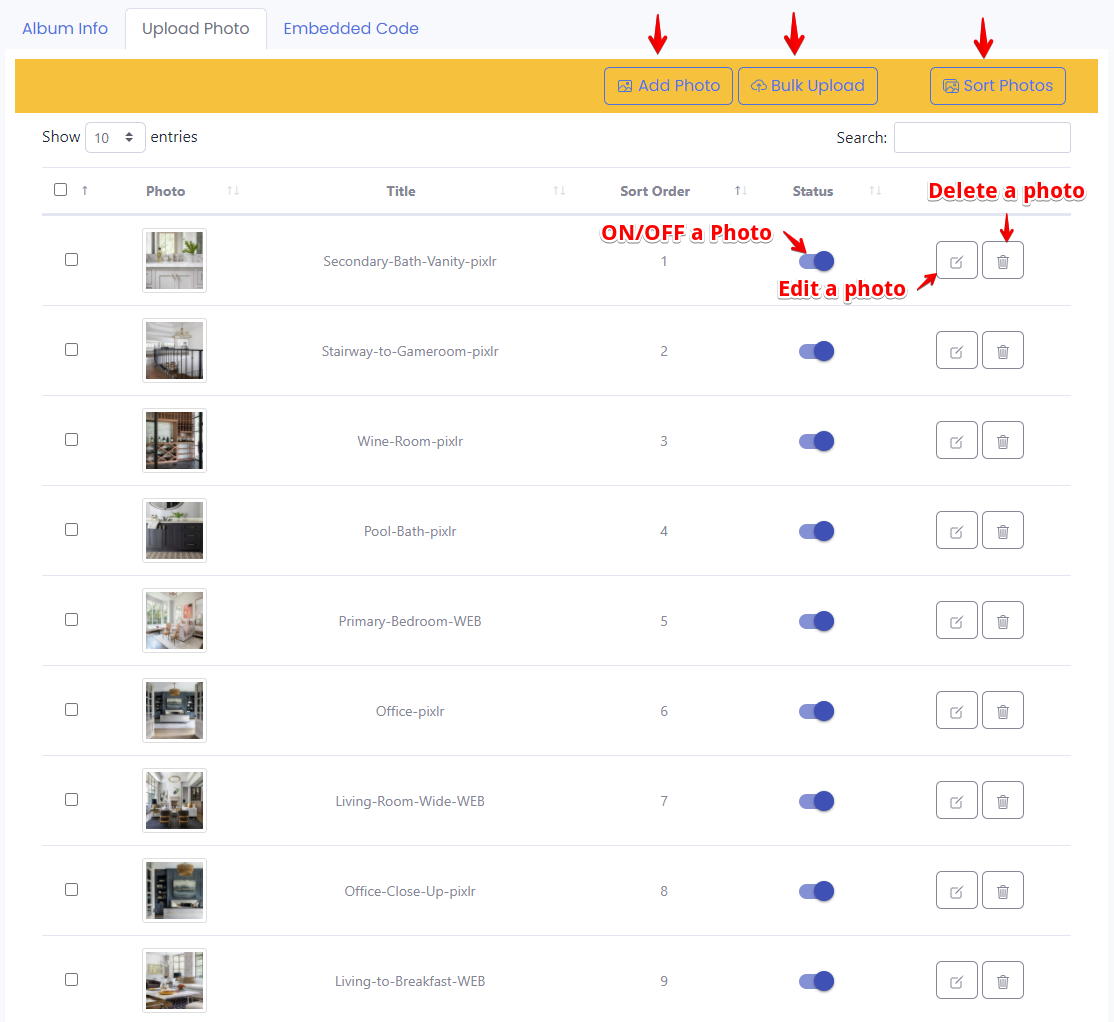
Click "Upload Photo" tab and click "Add Photo" button to add new a photo into the album.
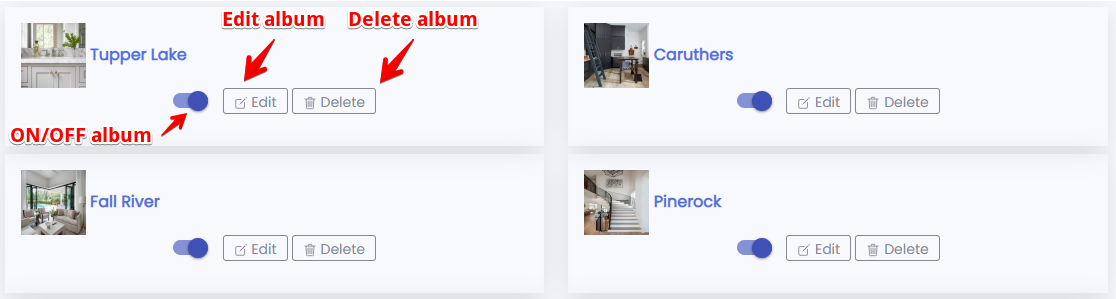
Edit an album:
From the Manage Albums, click the pen icon on an album item you want to edit.
Upload Photo, ON/OFF, edit, reorder or delete photo.
Get the default album URL or embedded code to show the album into anywhere on your store.
Show gallery albums
The first, you need to enable the app embeds on your theme.
Default, the main gallery albums collection shows on https://yourshopifydomain.com/apps/gallery/albums but if you want to show it on a page, please follow 2 steps below:
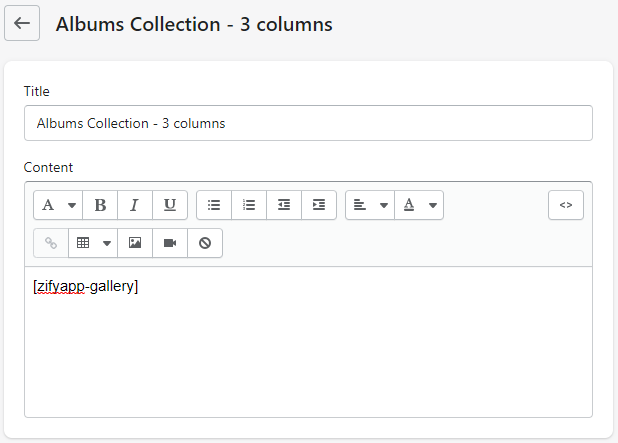
From your backend, go to Online Store > Pages to add/edit a page.
Paste embedded code [zifyapp-gallery] into the Content field
See screenshot below
Examples:
Albums Collection - 2 columns: https://zifyapp-demo-03.myshopify.com/pages/albums-collection-2-columns
Albums Collection - 3 columns: https://zifyapp-demo-03.myshopify.com/pages/albums-collection-3-columns
Albums Collection - 4 columns: https://zifyapp-demo-03.myshopify.com/pages/albums-collection-4-columns
Albums Collection - 1/3 + 2/3 columns: https://zifyapp-demo-03.myshopify.com/pages/albums-collection-1-3-2-3-columns
Albums Collection - 2/3 + 1/3 columns: https://zifyapp-demo-03.myshopify.com/pages/albums-collection-2-3-1-3-columns
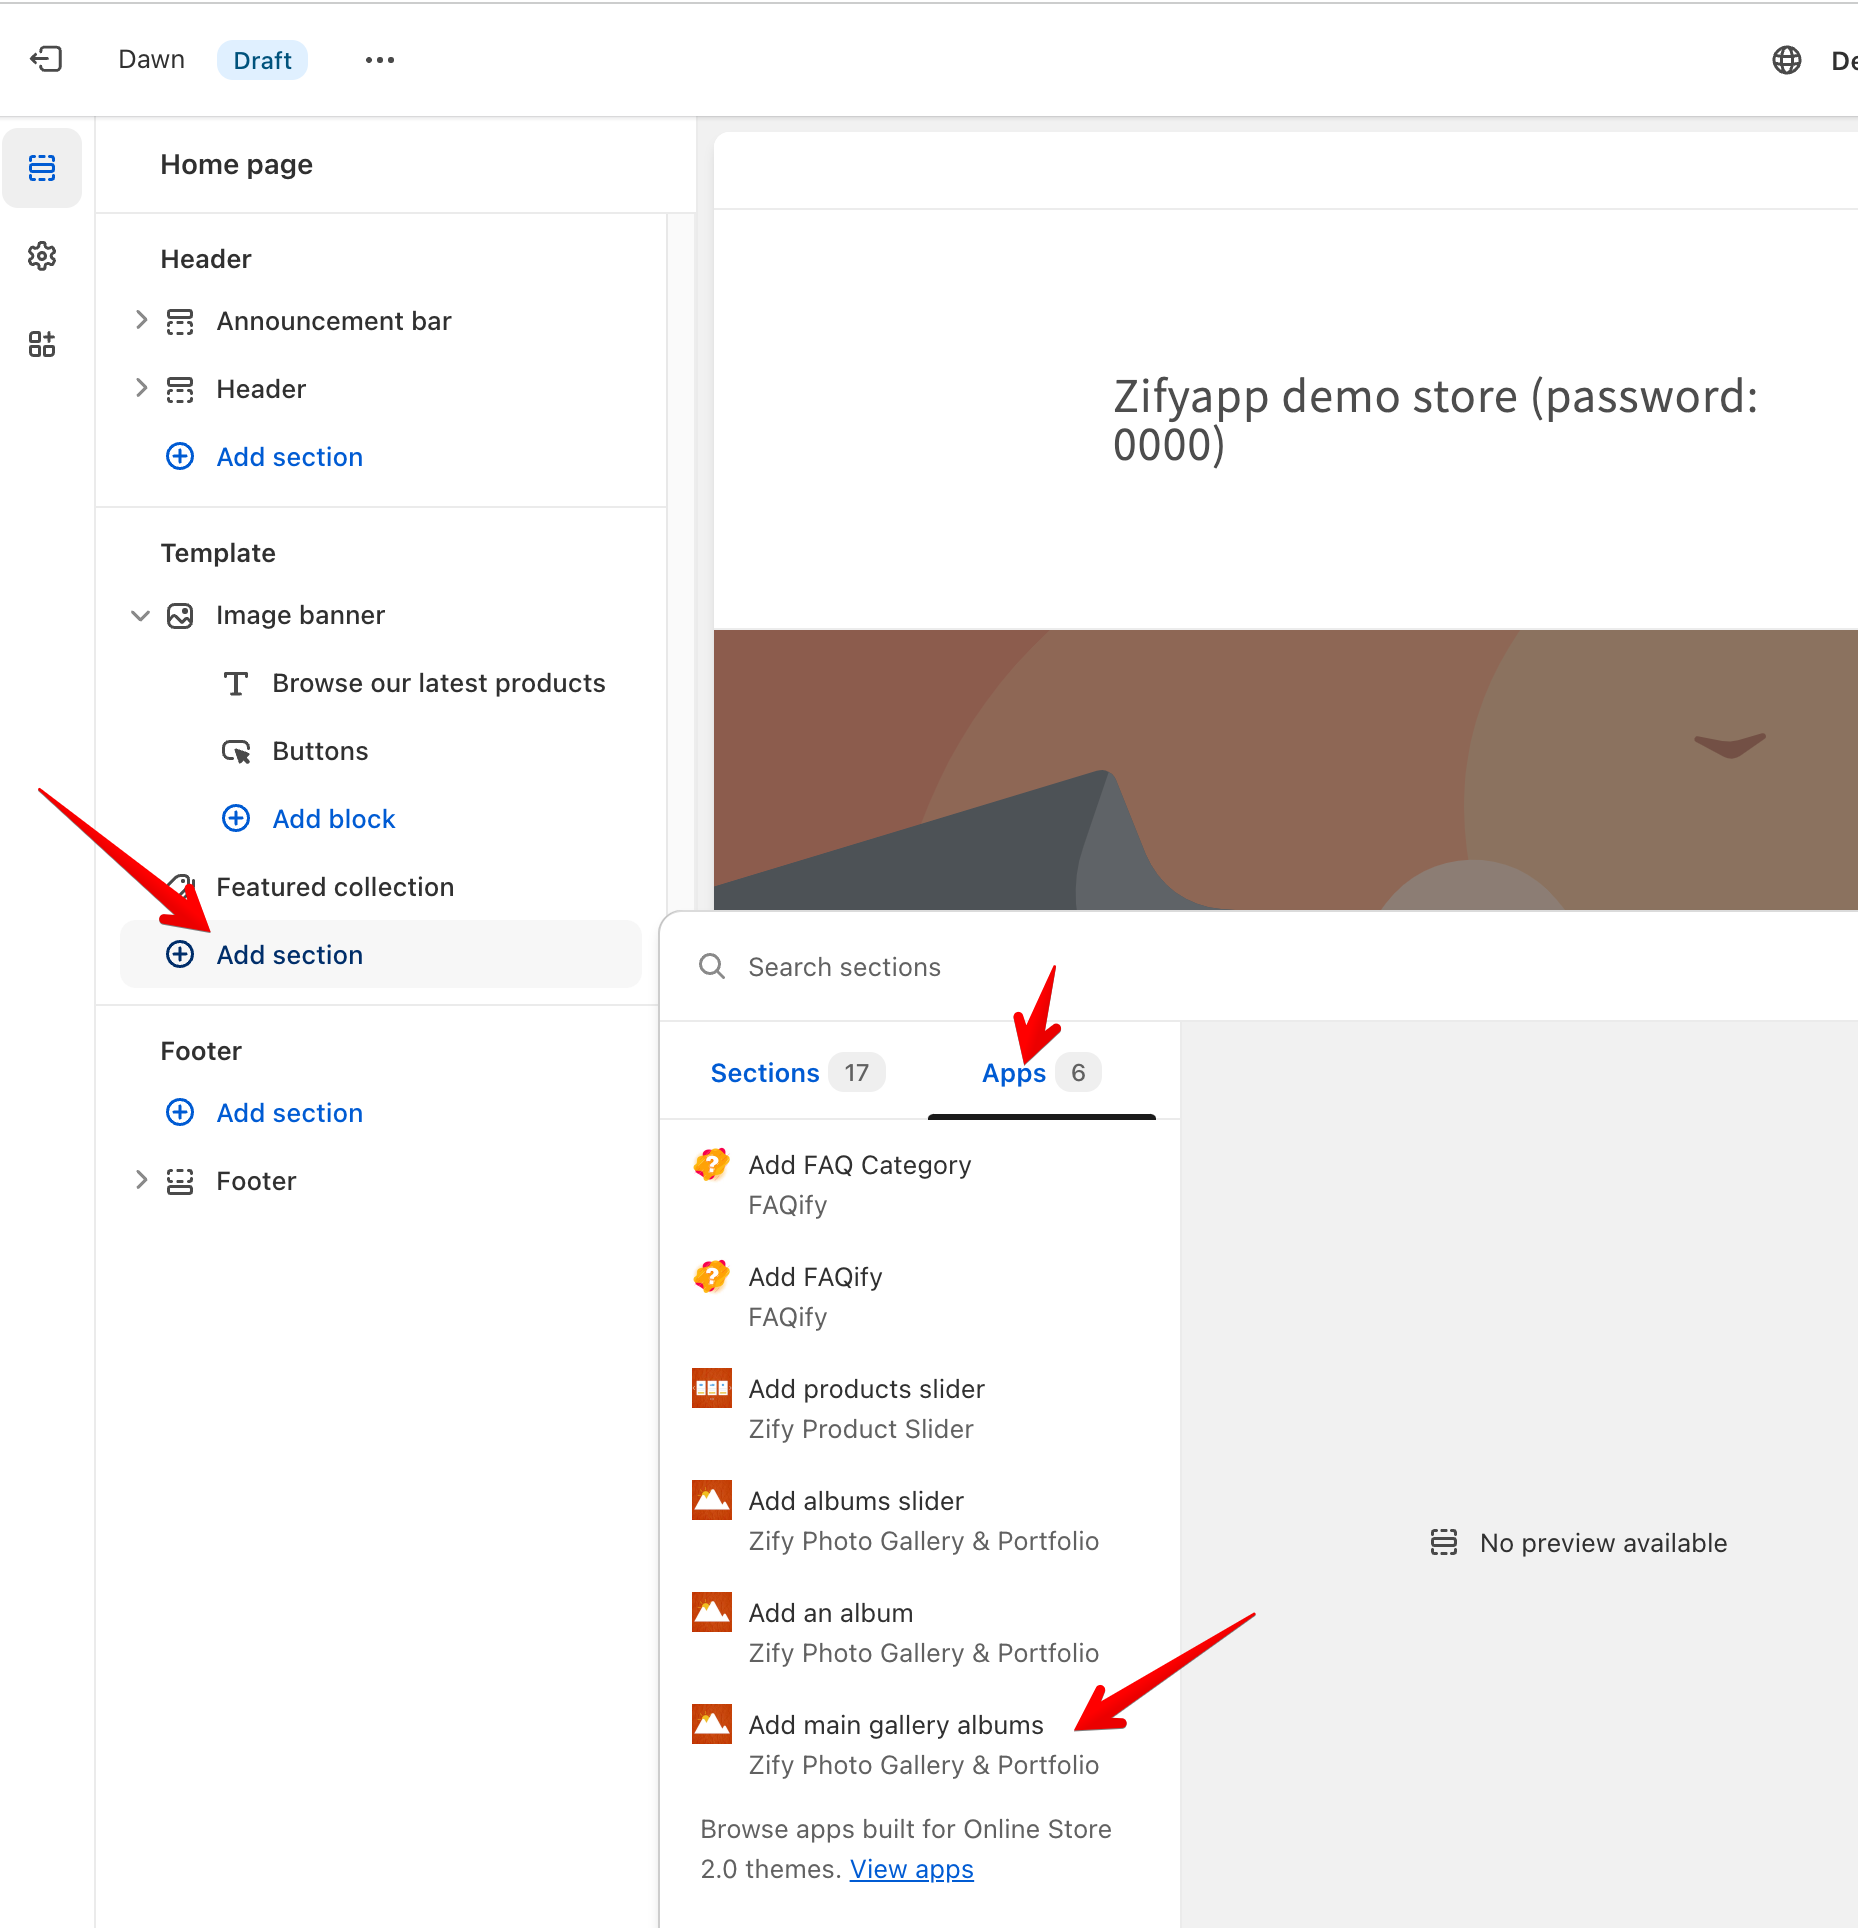
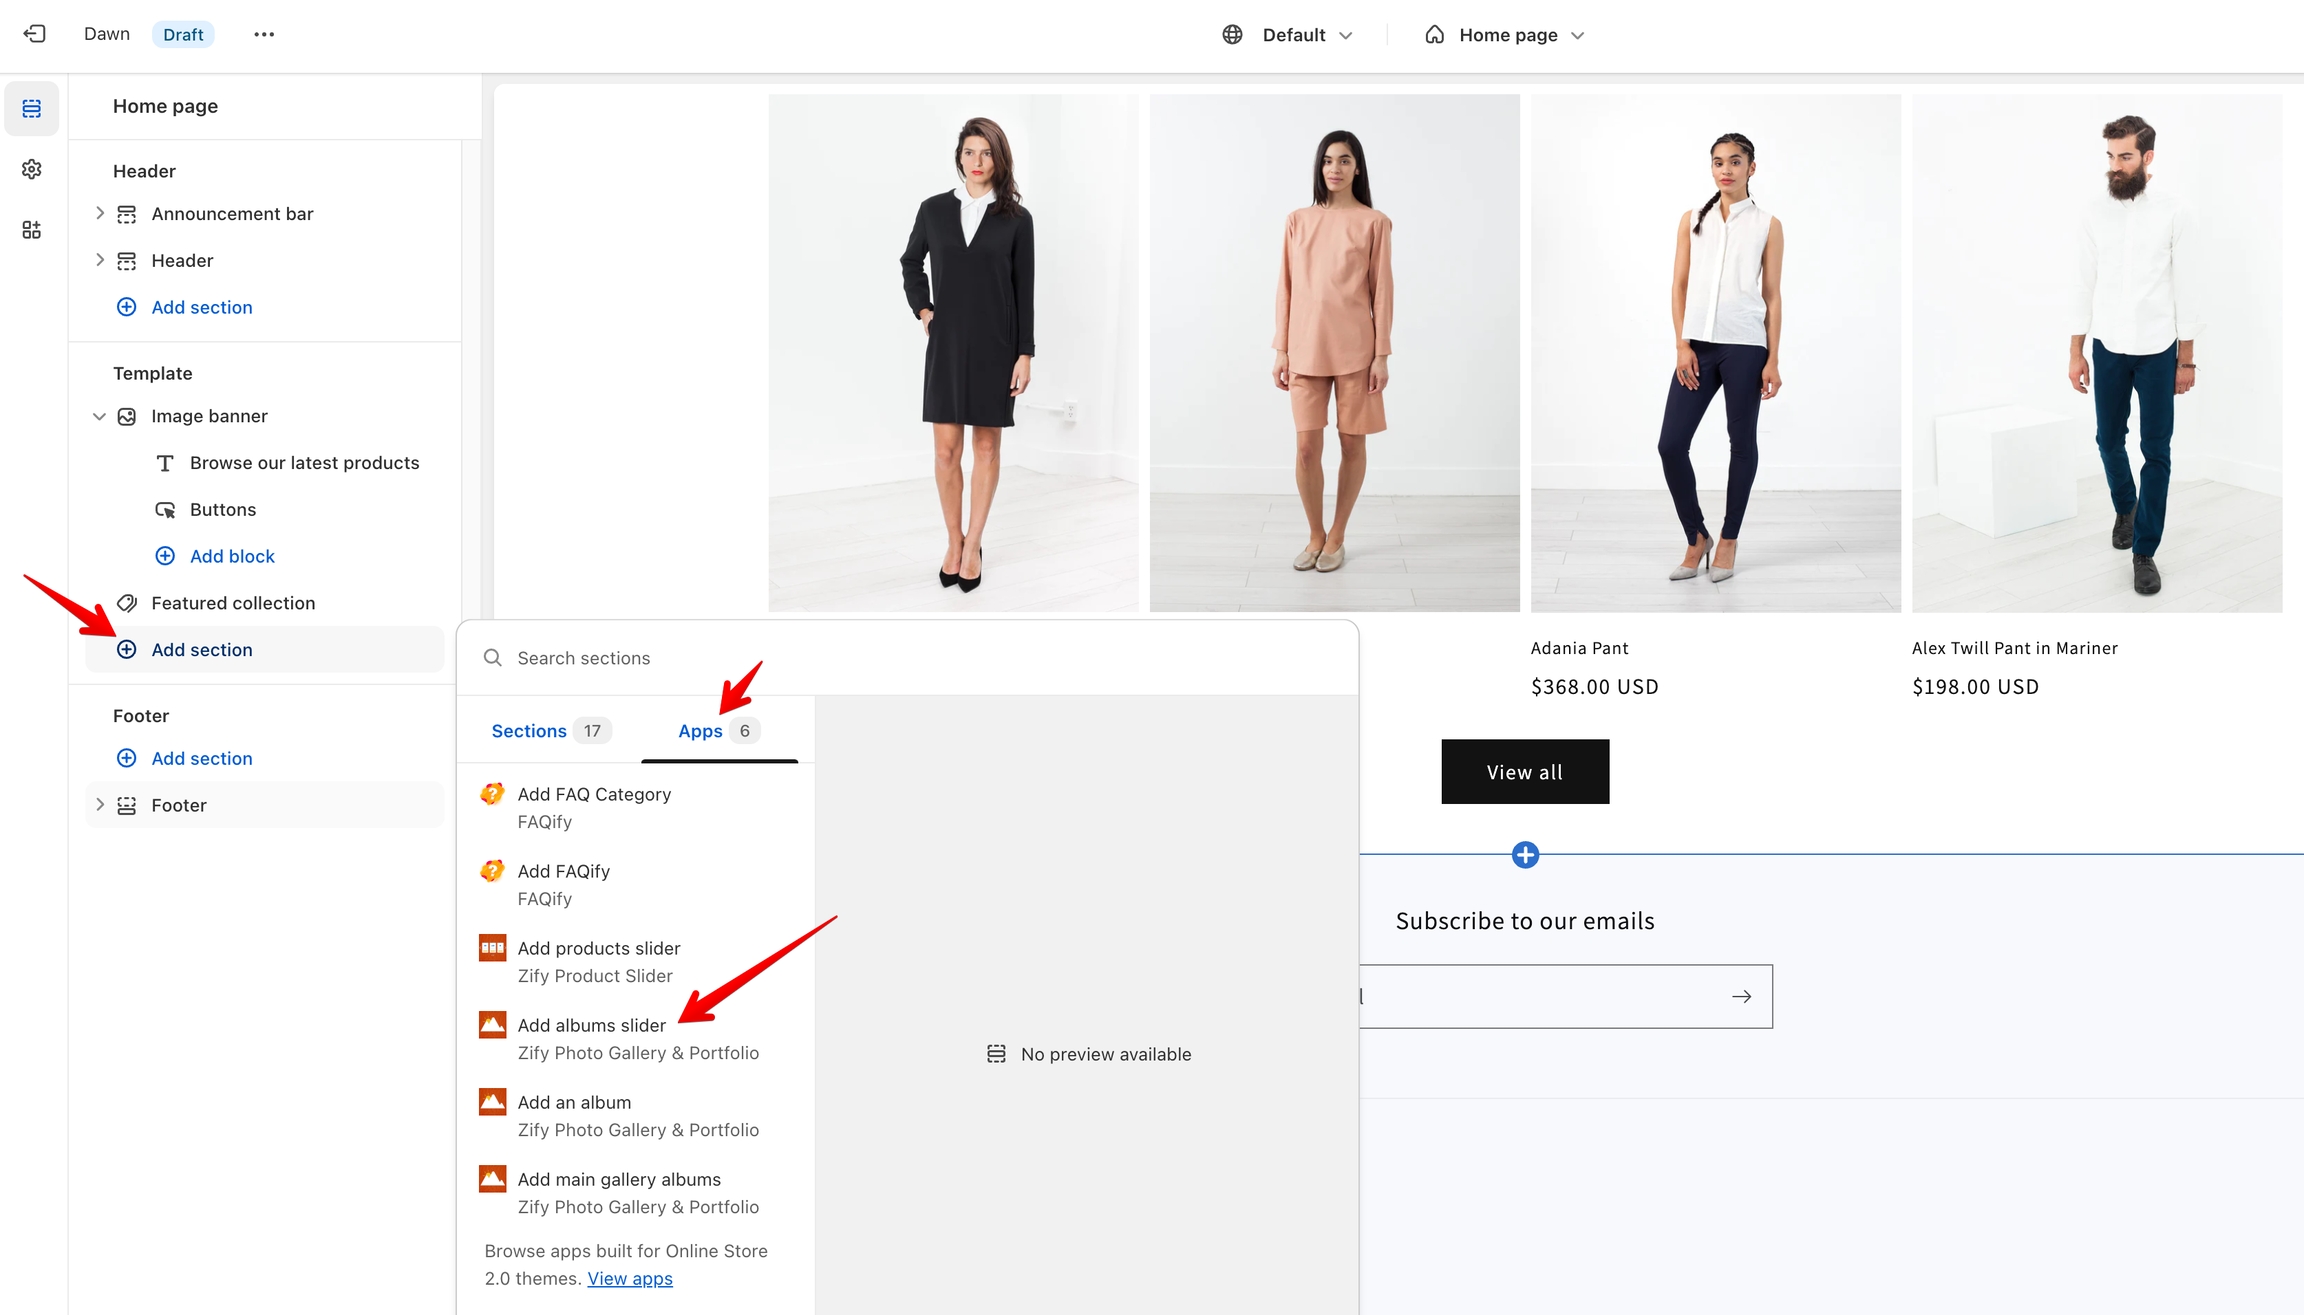
If your theme is OS 2.0, you can add app section into anywhere
Show an album
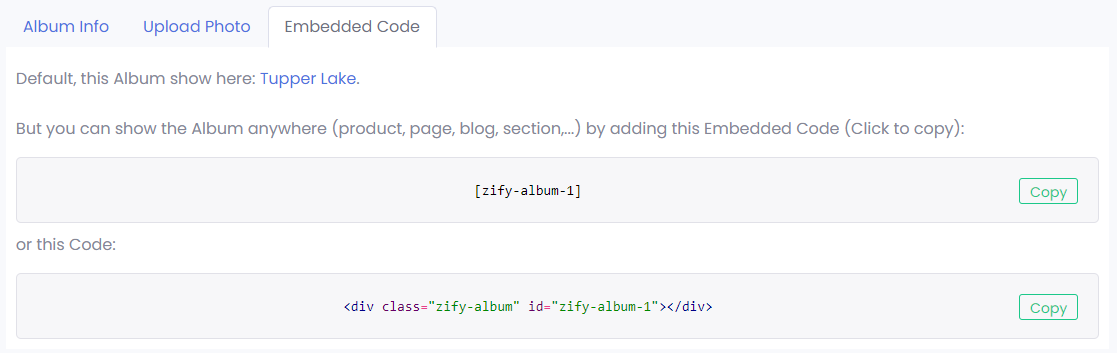
After you created an album, you can see the album URL default in the Embedded Code tab. For example: https://zifyapp-demo-03.myshopify.com/apps/gallery/album/tupper-lake
Or you also can use the album embedded code to show the Album anywhere (product, page, blog, section,...)
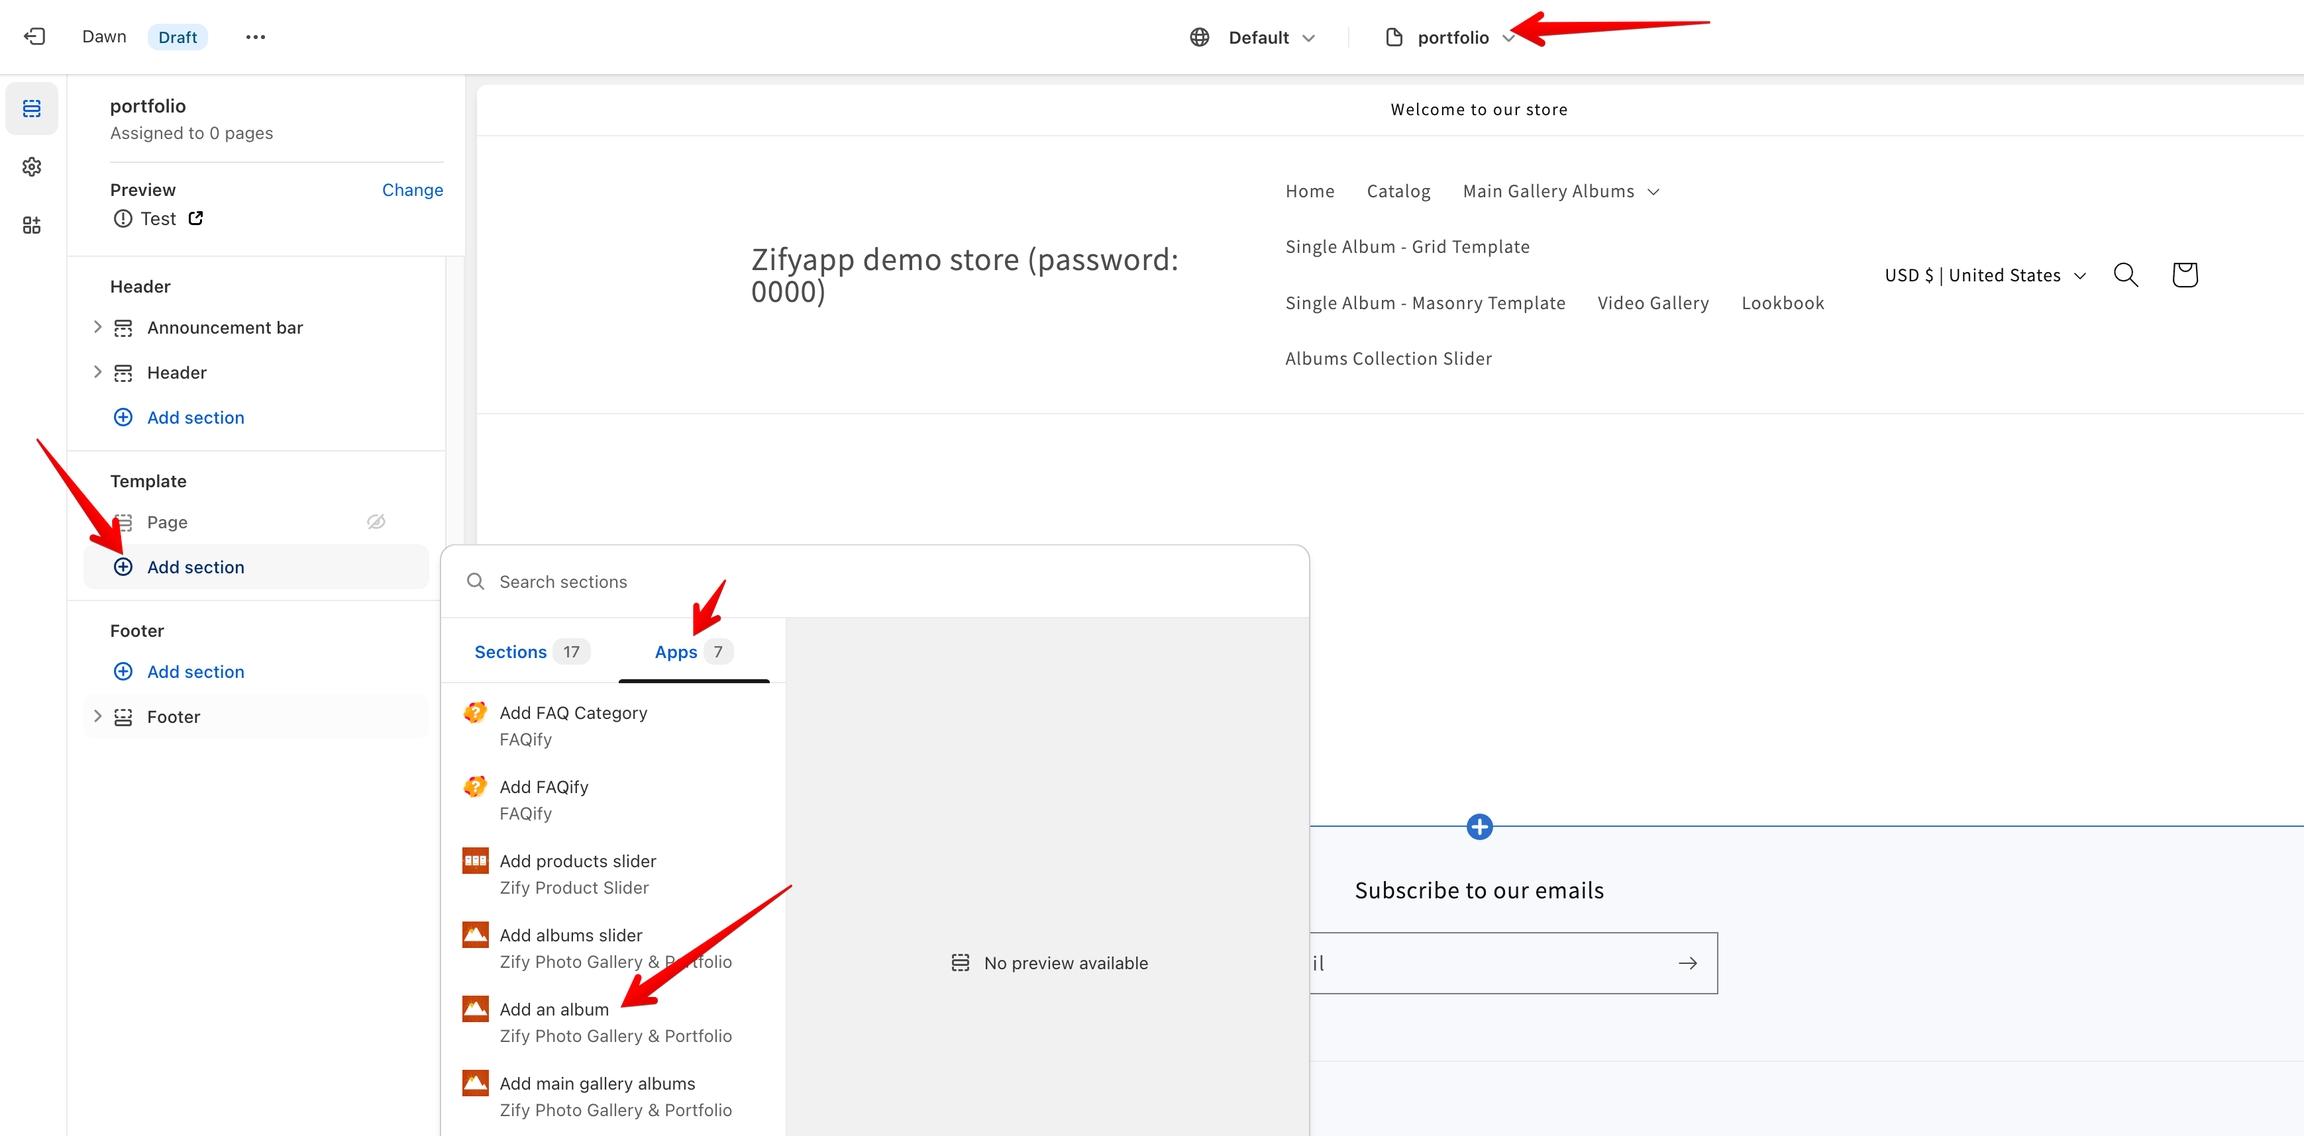
If your theme is OS 2.0, you can add app section
Show Albums Collection Slider
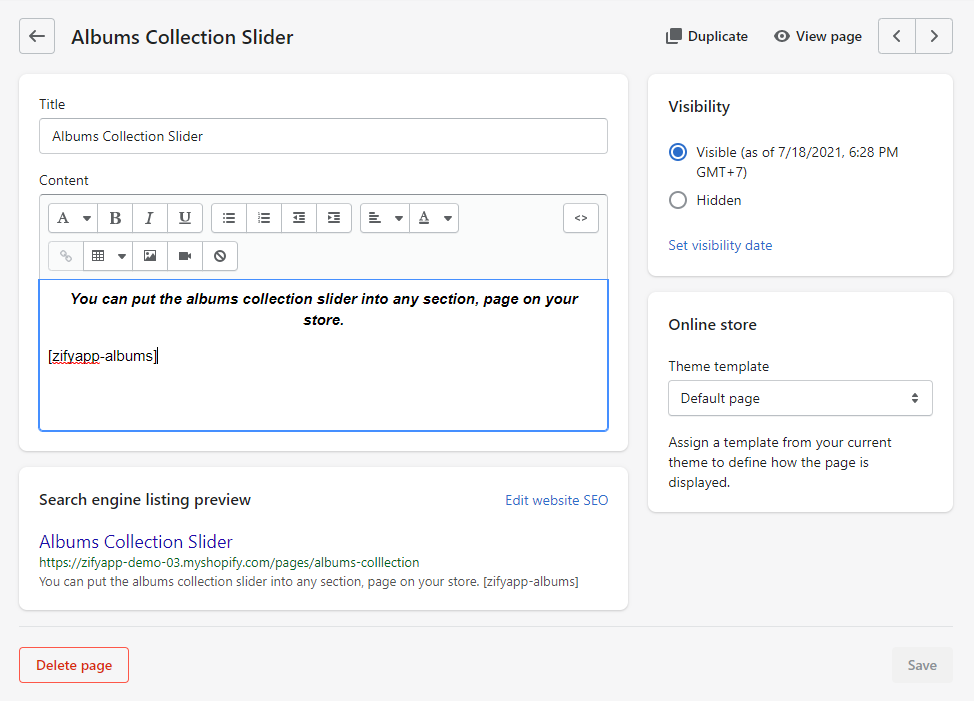
Use embedded code below
Embed albums collection slider into a page, see screenshot below
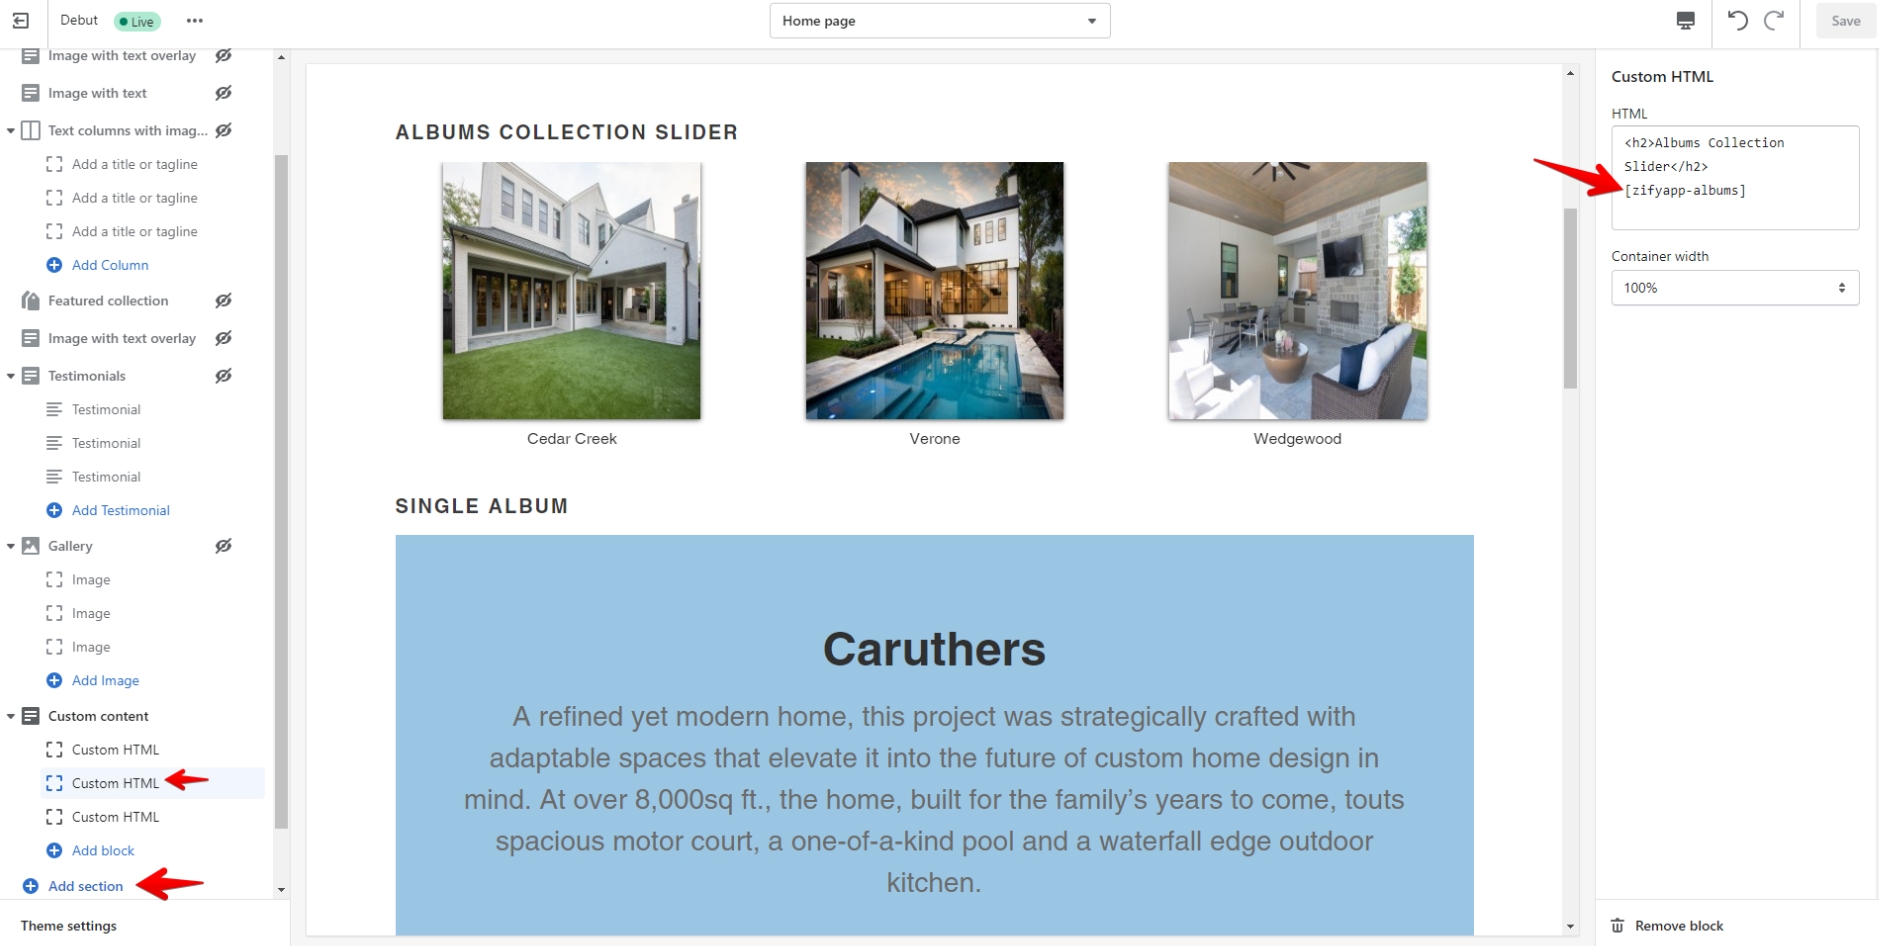
Embed albums collection slider into home page.
From your store admin, go to Online Store > Themes
Click Customize button from your current theme.
Add section > Custom content or Custom Liquid (this depends your custom theme)
Paste the embedded code and save.
If your theme is OS 2.0, you can add app section
Uninstall:
1. From your backend, go to Apps, then remove the Easy Portfolio Gallery app
2. Go to your current theme, edit the theme.liquid template file and remove two lines of code with "zify".
Last updated