☘️Size Chart - User Guide
Install:
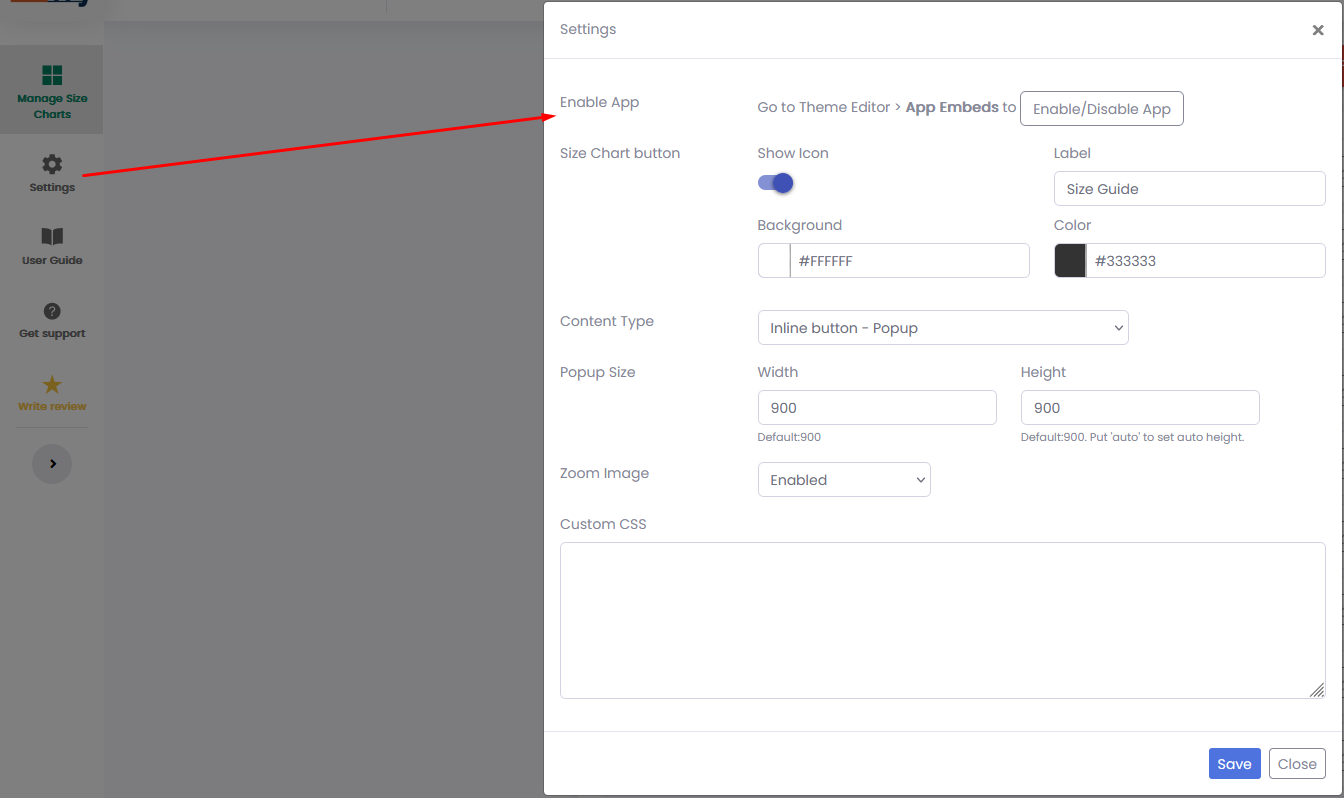
After installed our Size Chart app, the app will redirect you to the Manage Size Charts screen. The first, let enable the app. Please click the settings from the left navigation to enable the app.
Size Chart Label: Change the button label. This button to open the size chart popup.
Size Chart button: Icon, Label, Background, Color.
Content Type: Inline button - Popup: The button shows on the product content, click on it to show the size chart popup. Widget - Popup: The button shows on 4 positions: Right-Center, Right-Bottom, Left-Center,
Left-Bottom. Inline content: The size chart content shows on the product content.
Zoom Image: Enable/Disable the zoom feature when hover on the image of size chart.
Custom CSS: You can add your custom CSS code here without edit your theme.
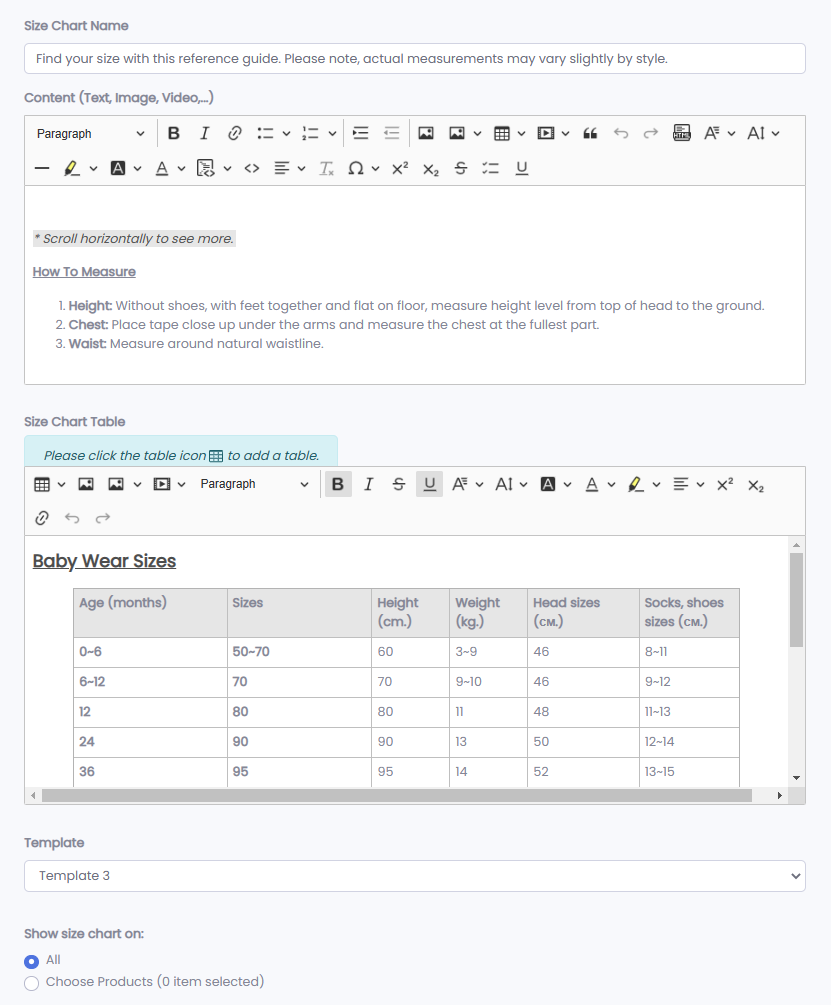
Add a Size Chart:
From the Manage Size Charts, click the Add a Size Chart button.
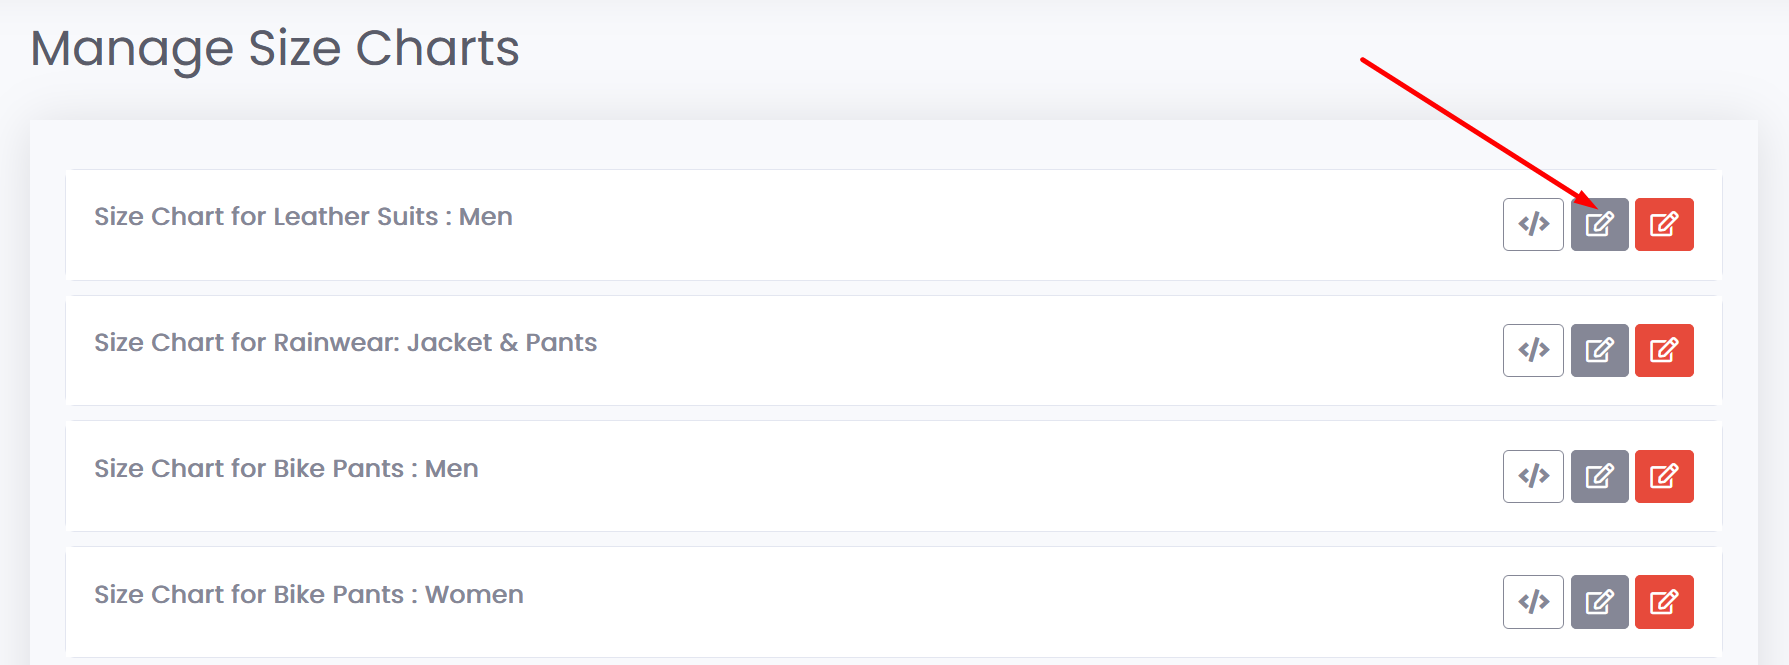
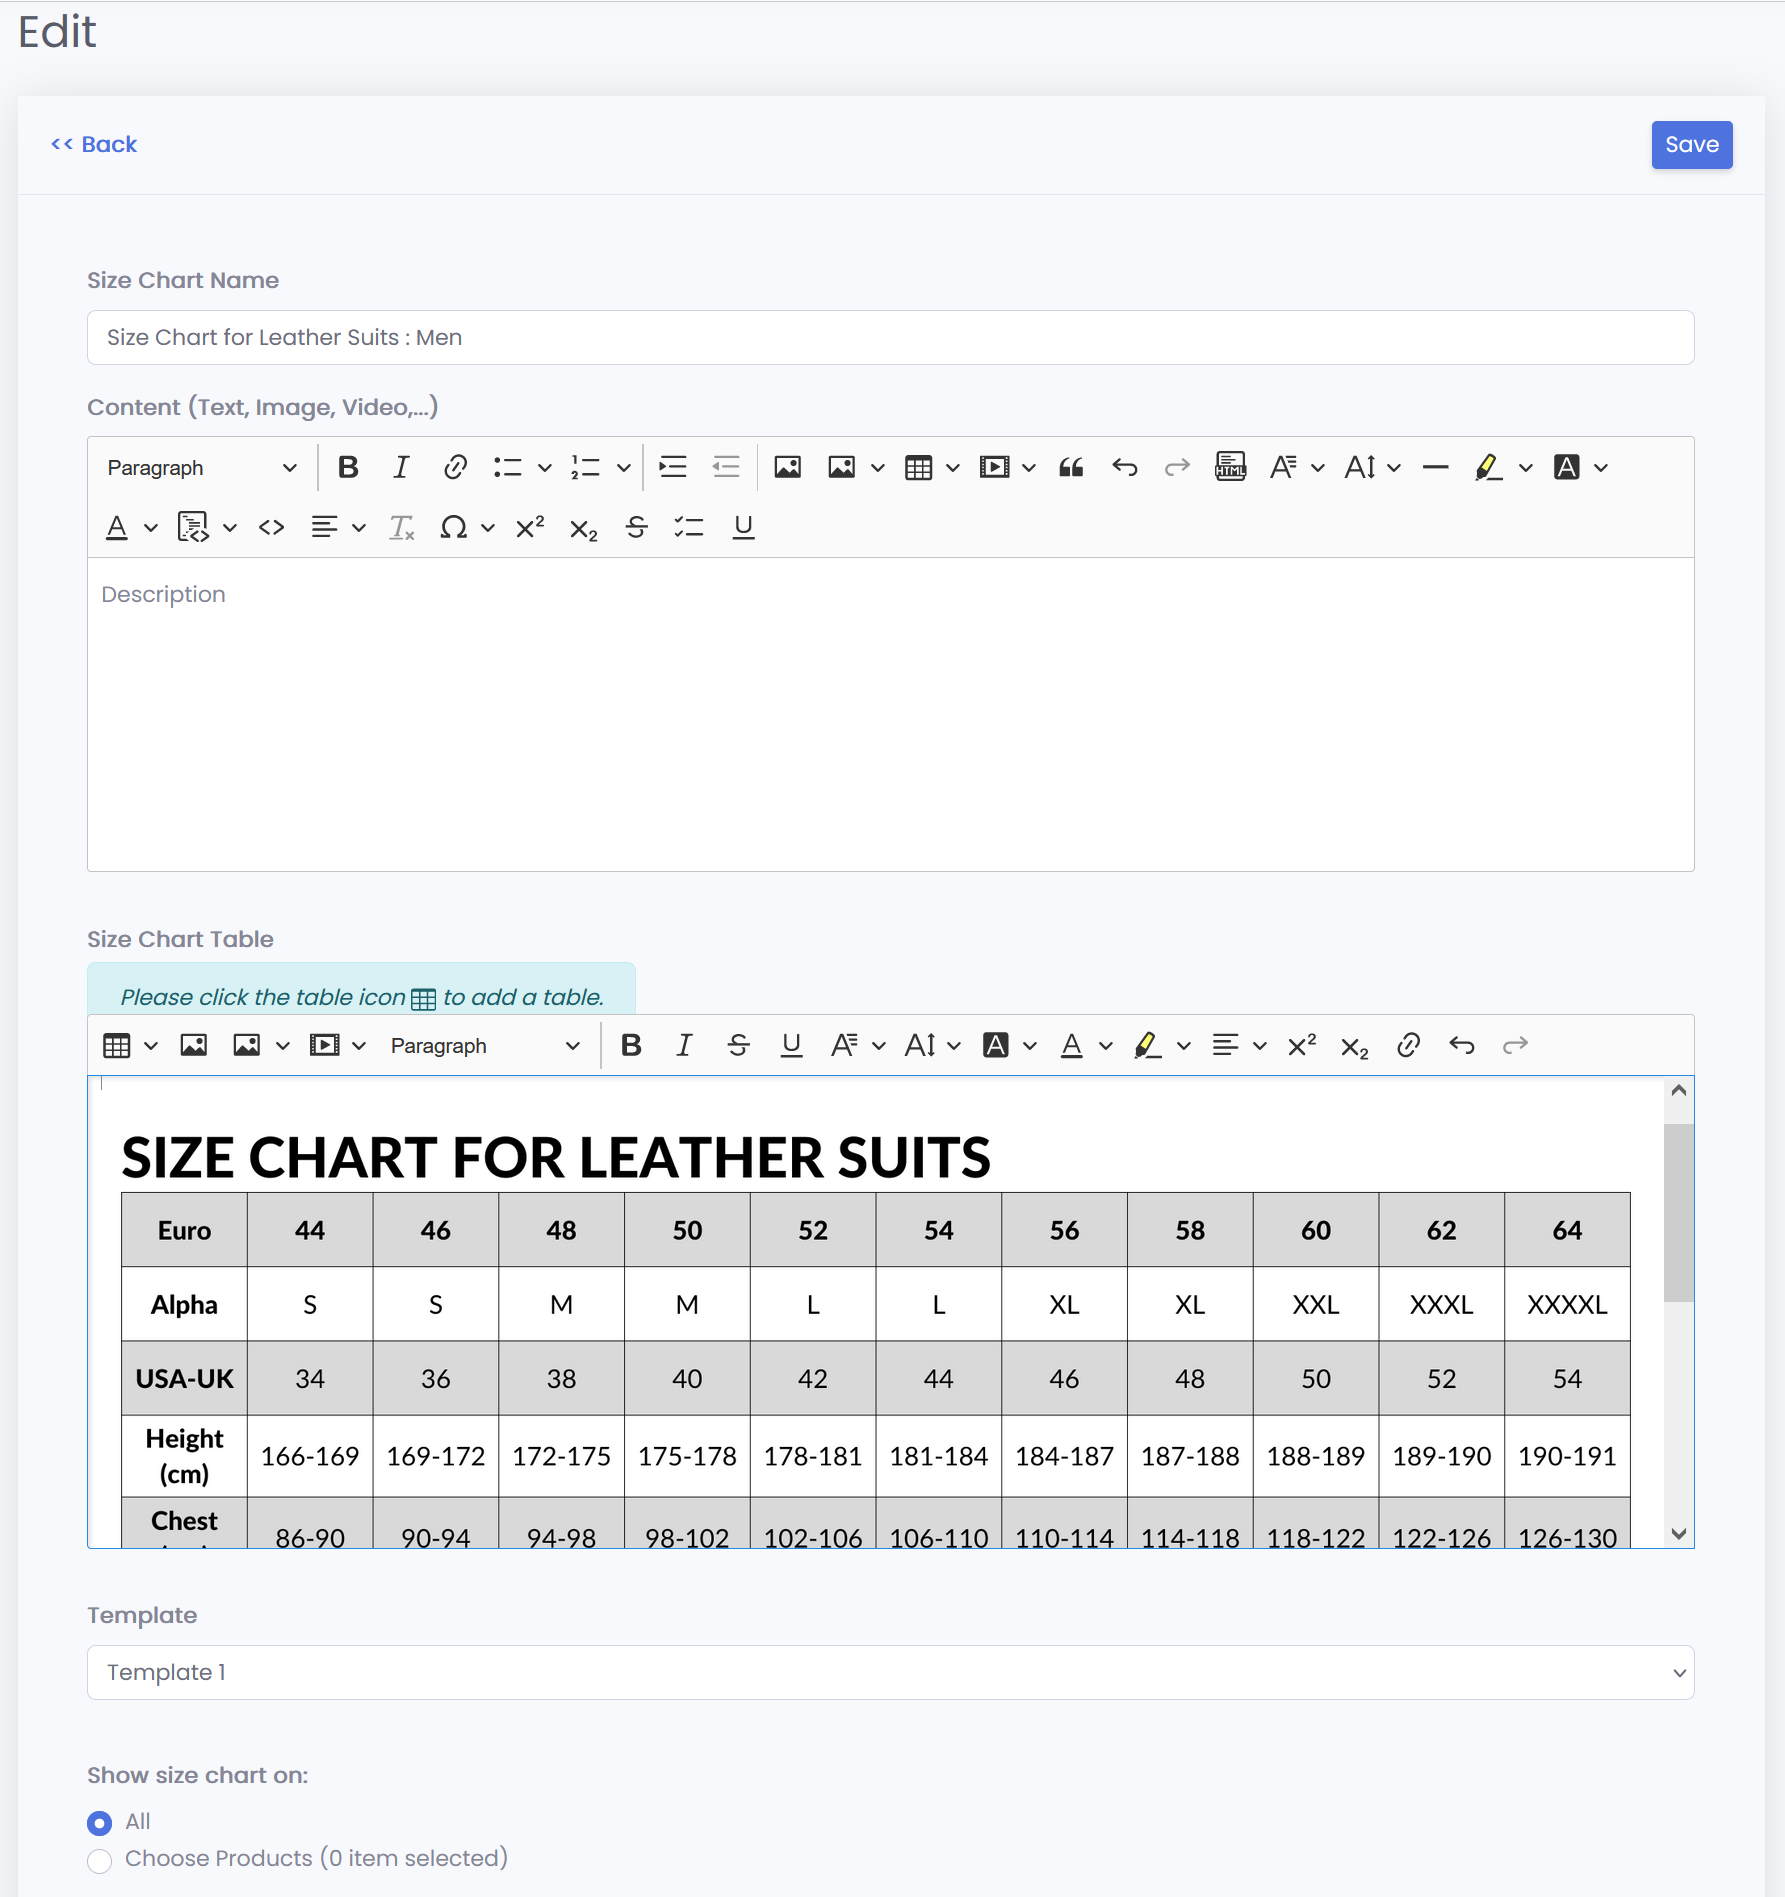
Edit a Size Chart:
From the Manage Size Charts, click the pen icon on a size chart item you want to edit. See the screenshots below:
Integrate Theme:
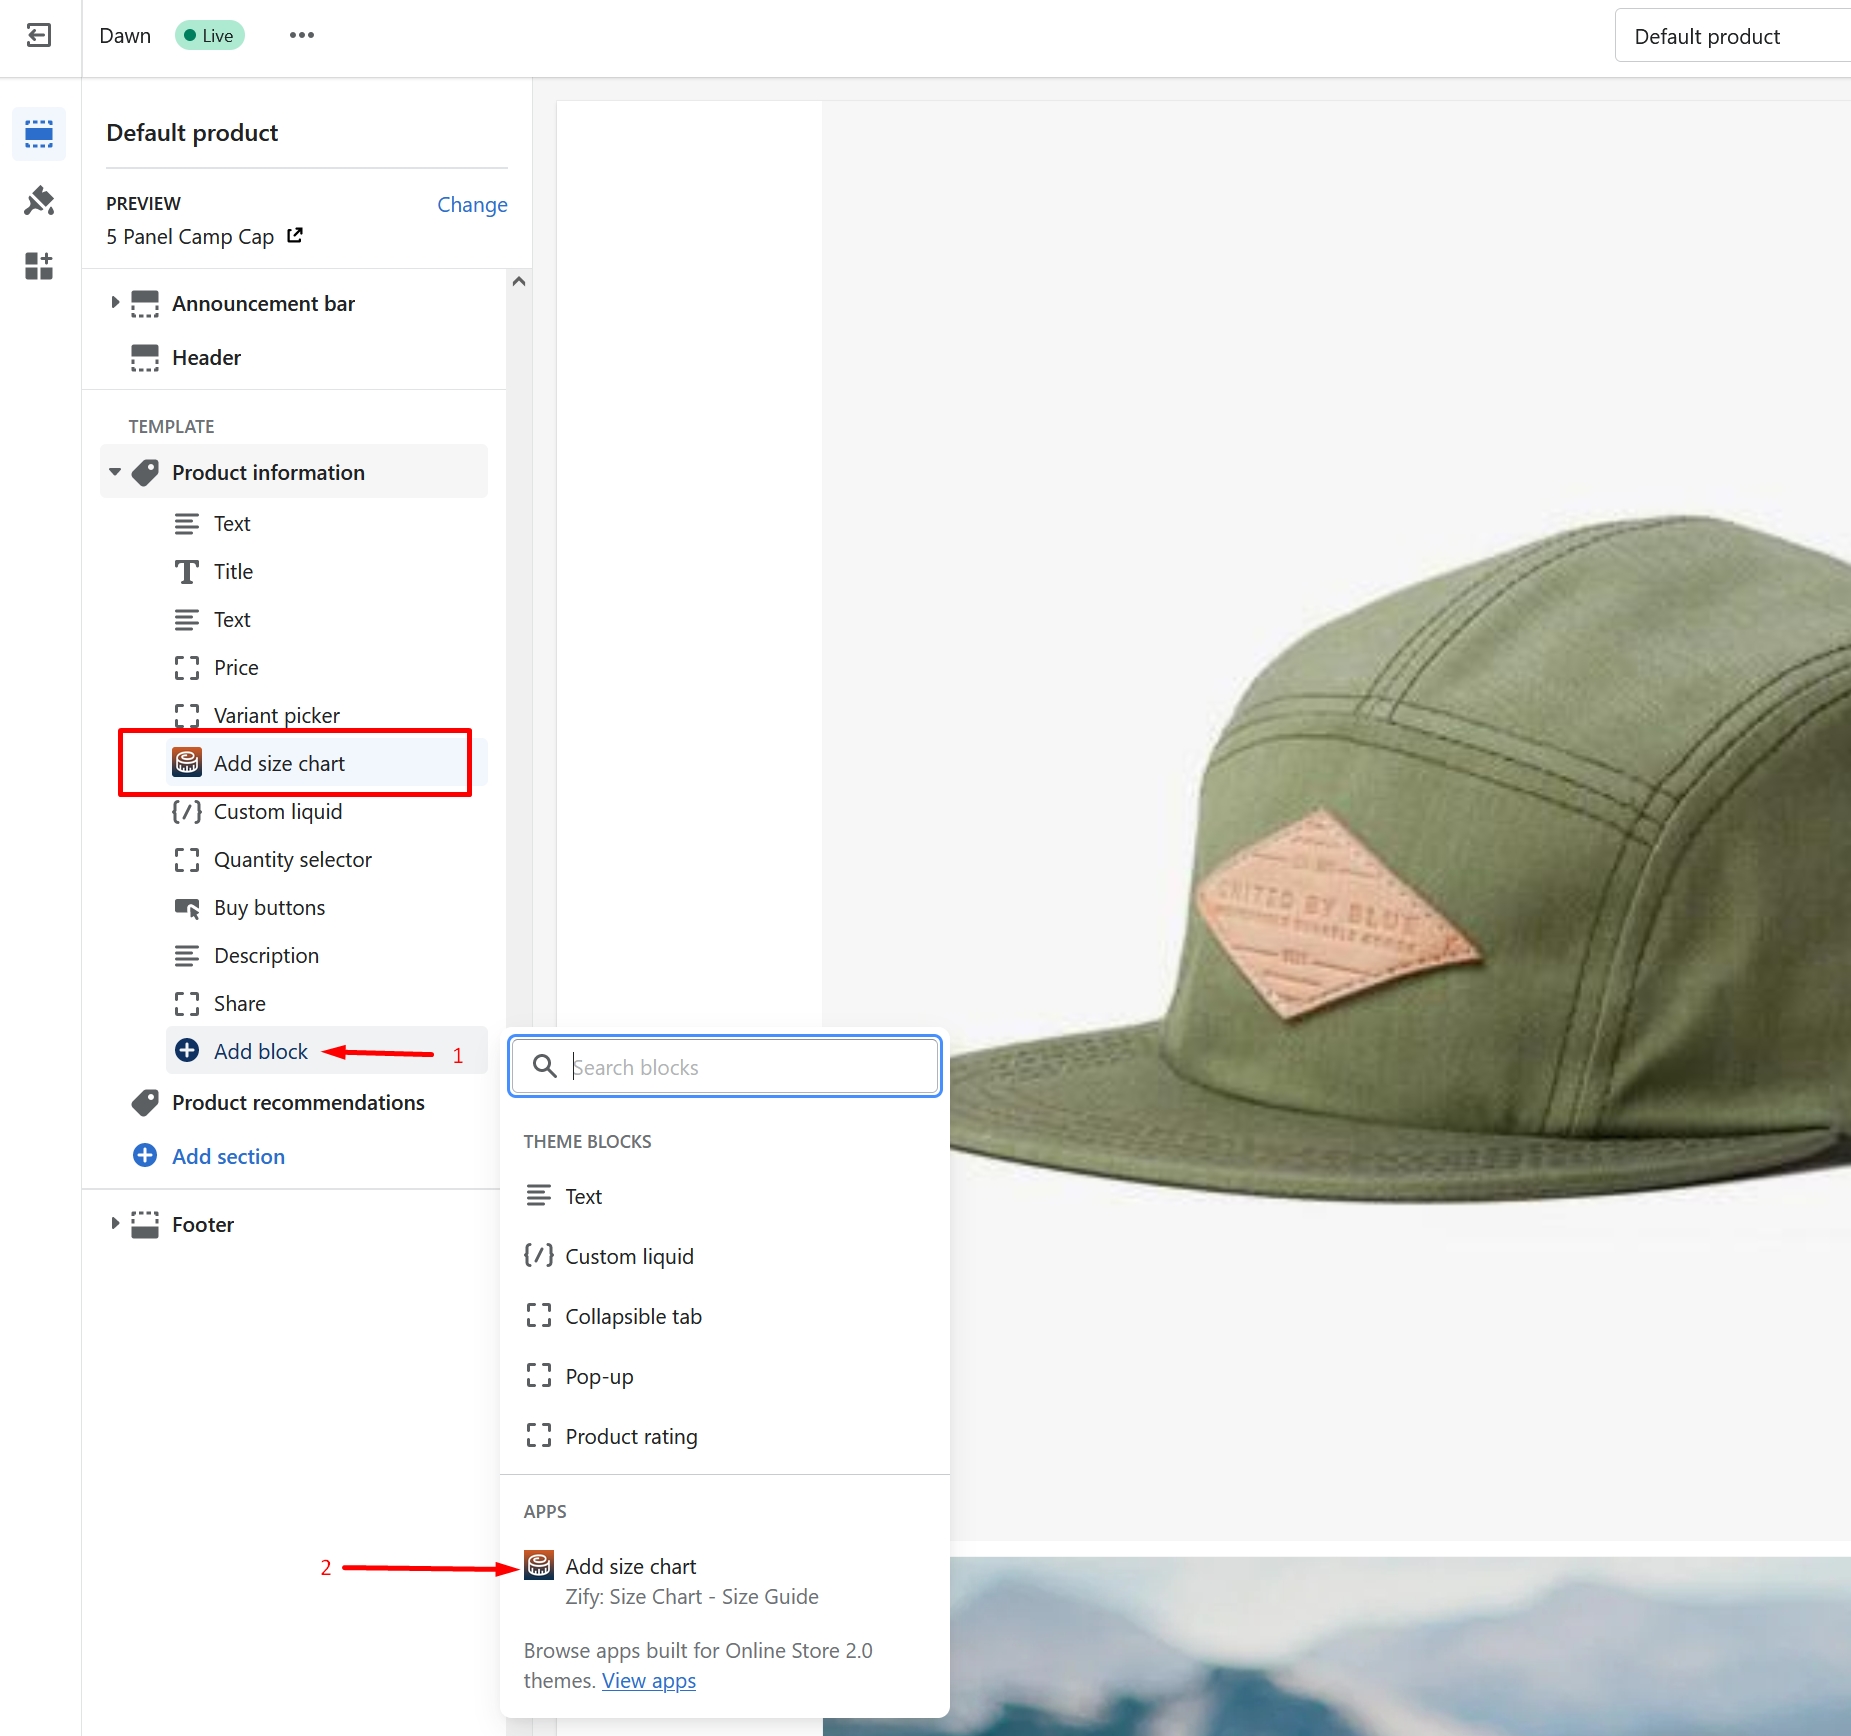
Option 1: Add a section block (Theme OS 2.0)
With this way, you don't need to use the embedded code.
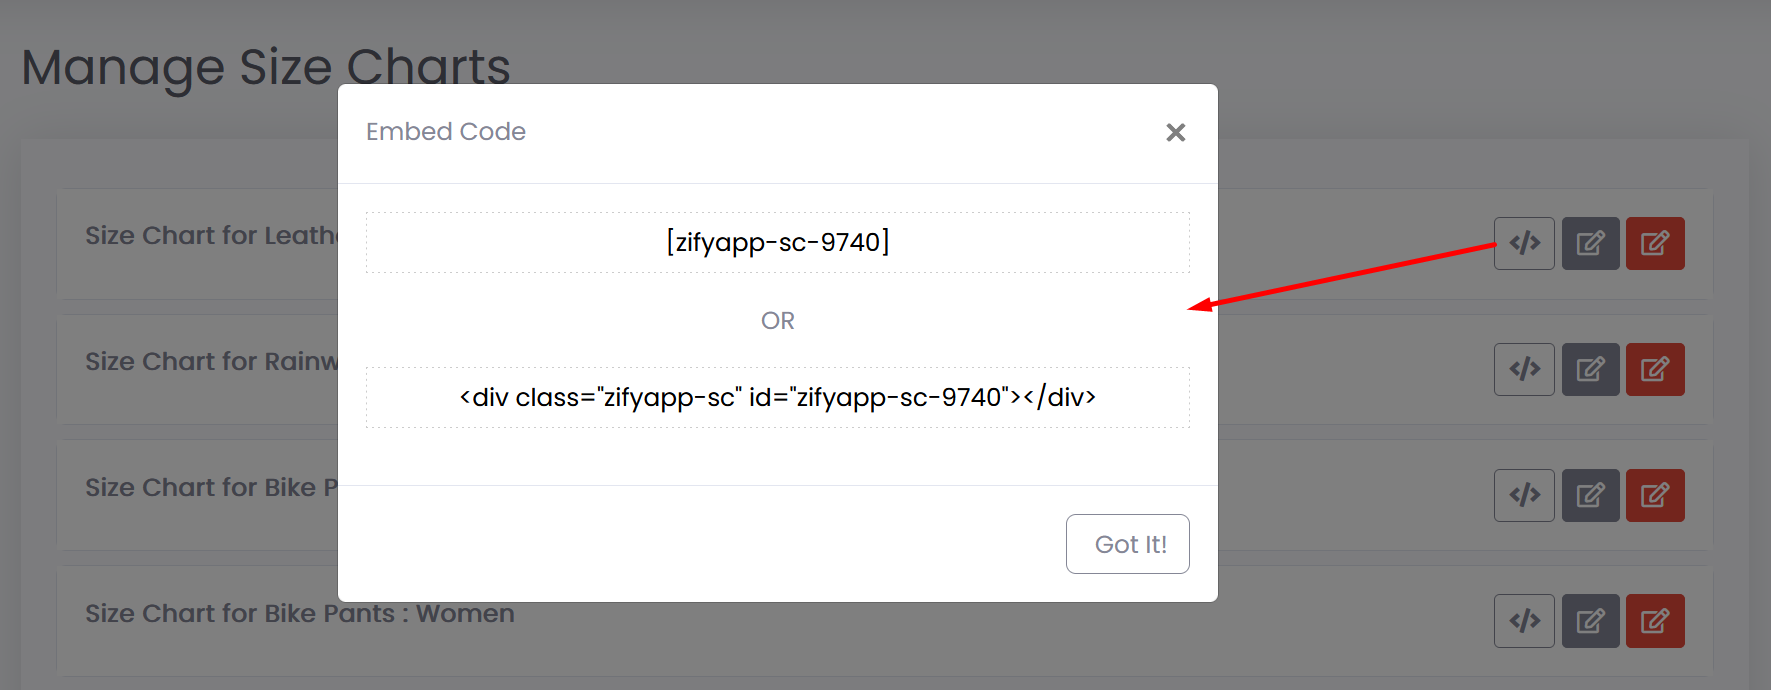
Option 2: Embedded code
Edit a size chart item to get an embedded code or click the code icon to get the embedded code. See the screenshot below:
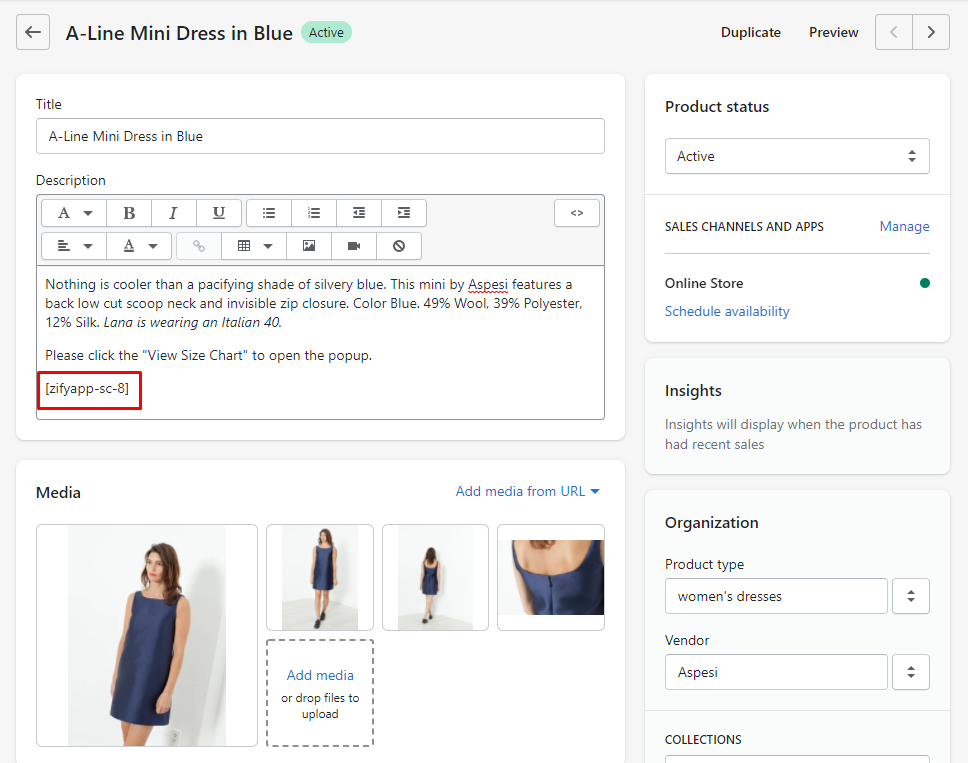
Use the embedded code and paste it into any product on your store.
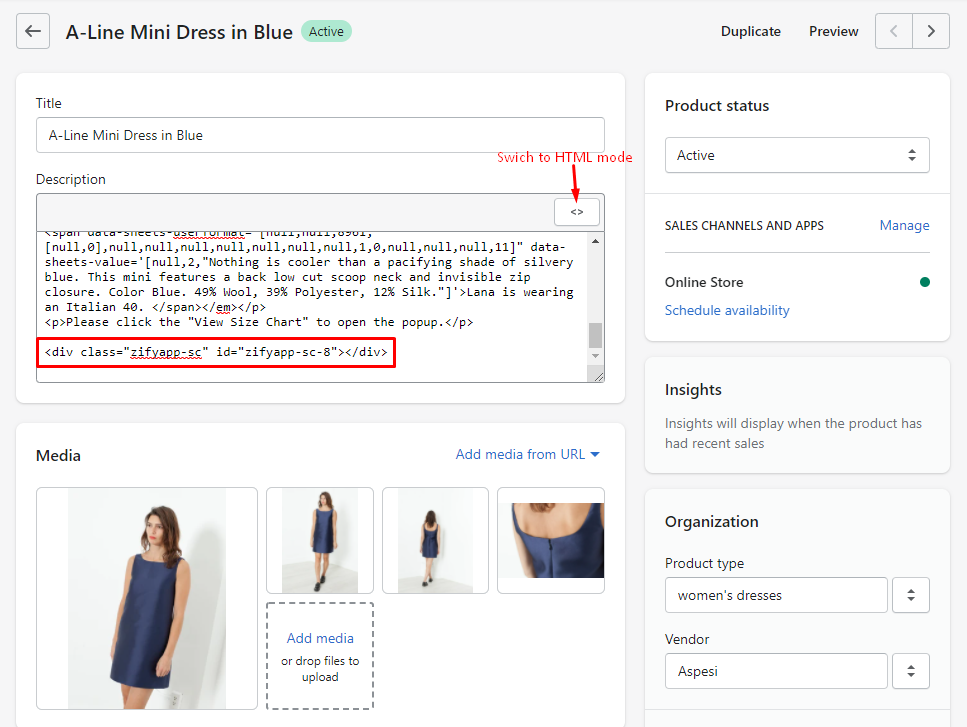
Paste the embedded code into the product description: From your admin, go to Products, edit a product.
HTML Embed
OR TEXT Embed
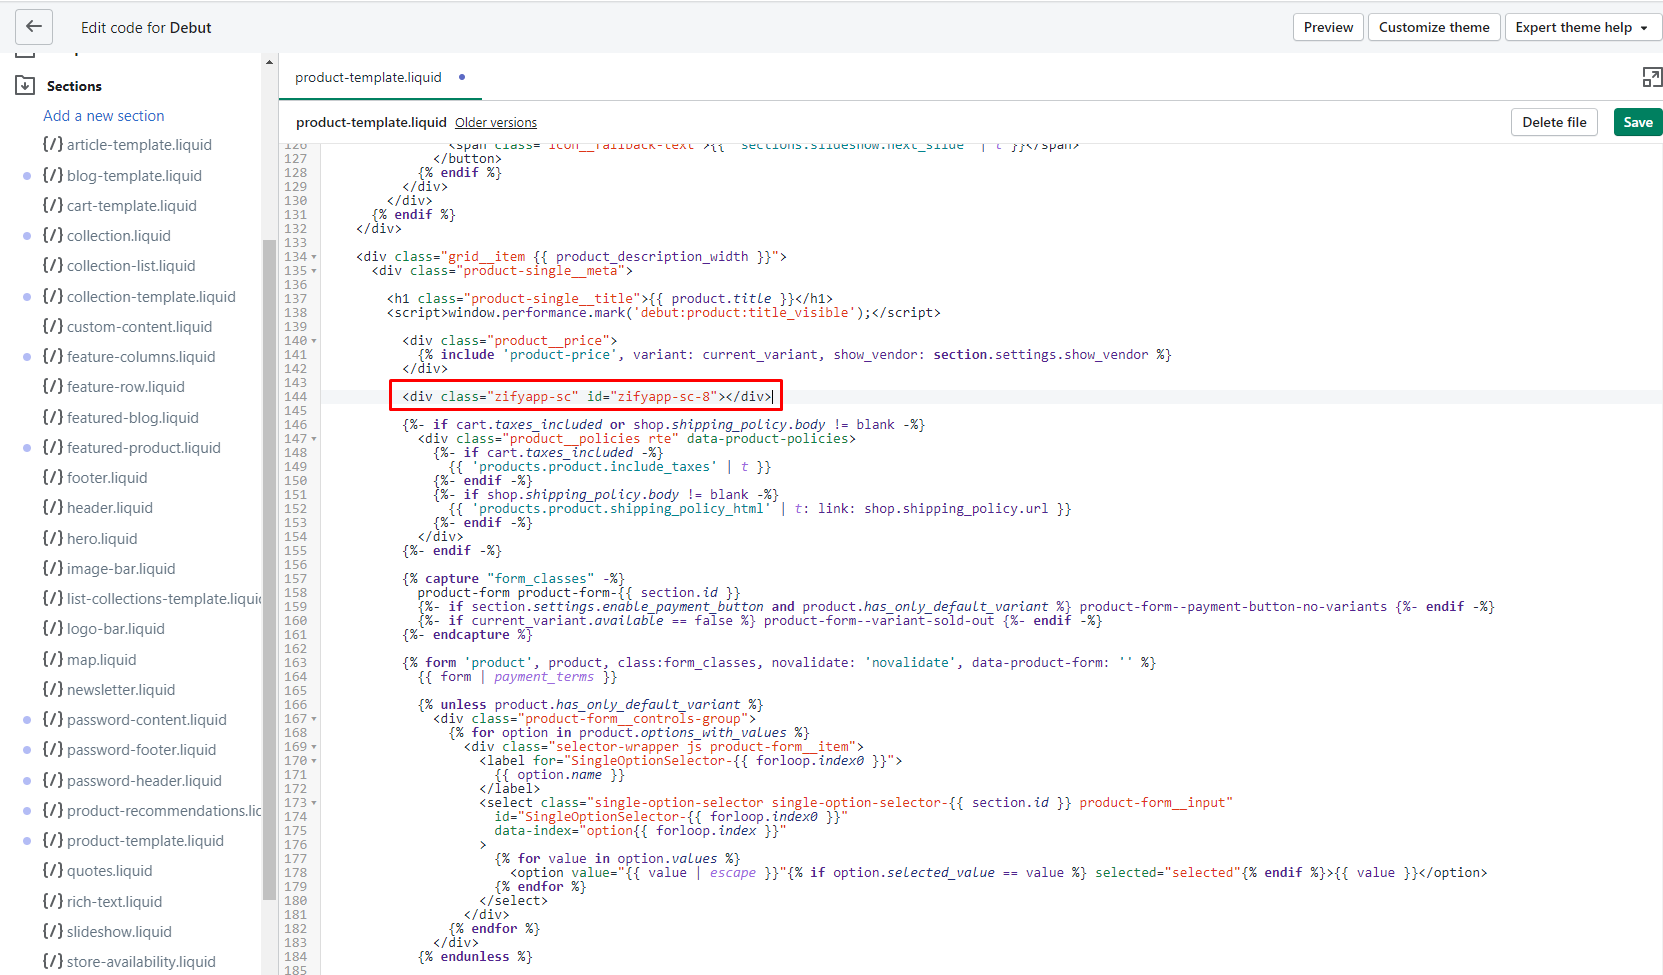
Or paste the embedded code into the Sections/product-template.liquid: From your admin, go to Online Store > Themes, edit code of current theme.
Uninstall:
From your store admin, go to Settings > Apps and sales channels to remove Snake Size Chart & Size Guide app.
Last updated